At my classes last week, participants learned some different ways to use the Stylish Stems Framelits and matching Special Reason stamp set.
Card 1:

- The card base is Thick Whisper White, layered with Whisper White embossed with the Sparkle TIEF.
- A Sahara Sand Stitched Shapes circle Framelit was added with Dimensionals.
- The small flower was stamped twice on a scrap of Whisper White with both Bermuda Bay and Flirty Flamingo inks and then die cut with the matching die.
- Two sets of the stem and leaves were die cut with Mint Macaron.
- The frame was stamped with Flirty Flamingo ink and die cut. An Aqua Painter and some Bermuda Bay ink created a watercolour background for the Memento Tuxedo Black ink sentiment.
And a little stamping on the inside ….

Card 2:
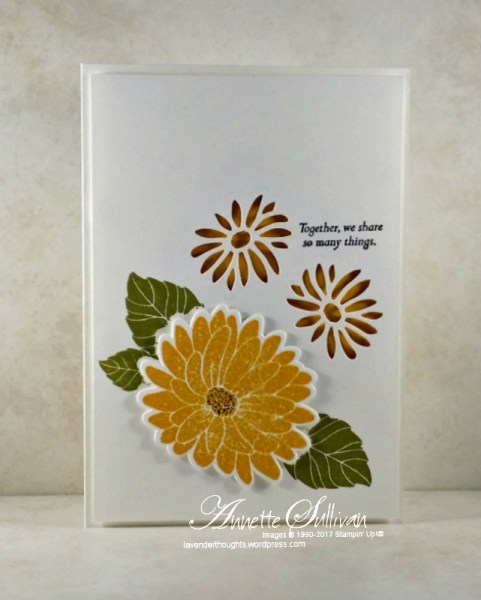
- Place a mask of the large flower on a piece of Whisper White and stamp some leaves around it using Old Olive ink. Keep the mask in place and die cut the small flower twice.
- Stamp the large flower in Crushed Curry on a scrap of Whisper White and die cut. Add to the card front with Dimensionals.
- Stamp a sentiment in black ink above the negative die cut flowers.
- Add a piece of Crushed Curry cardstock with Dimensionals behind the negative die cuts, and then attach the Whisper White art panel to the Thick Whisper White card base with Dimensionals.
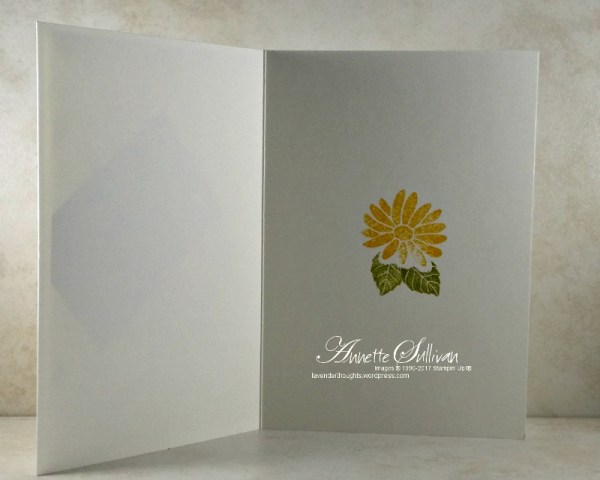
A little masking on the inside ….
Card 3:

- Die cut the large flower outline once and the small flower outline four times with Sweet Sugarplum DSP.
- Die cut the large leaf outline twice and the small leaf outline three times with Emerald Envy DSP.
- Die cut the large flower detailed image once and the small flower detailed image four times with Sweet Sugarplum cardstock.
- Die cut the large leaf detailed image twice and the small leaf detailed image three times with Emerald Envy cardstock.
- Place both the frame dies on a piece of Sweet Sugarplum and die cut a frame.
- Attach the detailed images to the outline images and add to the Thick Very Vanilla card base. Snip off the parts of the flowers hanging over the edge of the card base.
- Attach the frame to the card base and stamp a sentiment in black ink.
- Add some Basic Jewel Pearls to the centre of the flowers.
Attach the remaining flower and leaf to the inside …

The Stylish Stems Framelits and Special Reason stamp set are retiring on 31 May. Have you checked to see if any other of your favourite products are going to retire too? Contact me or visit my shop.


Thanks Leanne
LikeLike
Hi Annette,
Very nice cards.
LikeLiked by 1 person