Do you have issues trying to line up your images? Are they crooked or not inked fully? What you need is a Stamp-a-ma-jig (stamp positioner) to provide the magic.
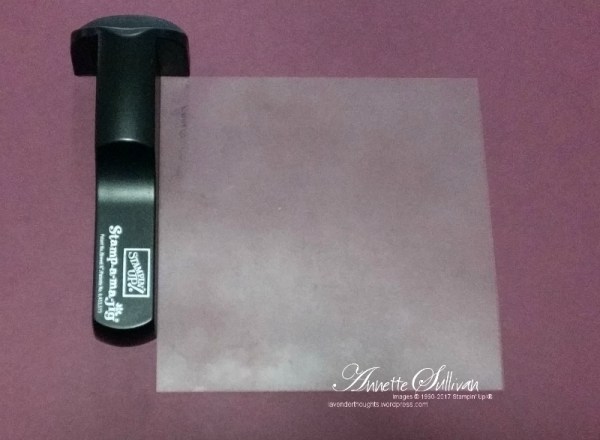
The Stamp-a-ma-jig consists of two pieces. An opaque acetate sheet and a ‘t-piece’. This is how it looks.
The secret is to ensure that the acetate sheet, the stamp and the cardstock are always right in the corner of the ‘t-piece’, AND do not move the ‘t-piece’ until you are entirely happy with your stamped image.
Steps:
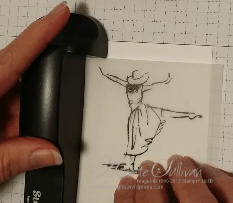
- Place acetate sheet in corner of ‘t-piece’. Ink image and stamp on sheet ensuring that the stamp is in the corner of the ‘t-piece’.
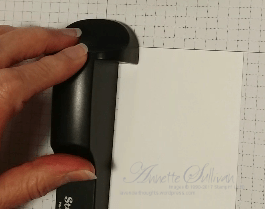
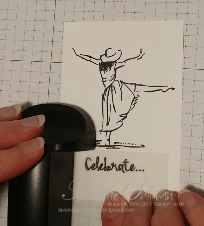
- Line up image on sheet over cardstock where you want to stamp and place ‘t-piece’ against the top and left corners.
- Remove the sheet and hold the ‘t-piece’ in place.
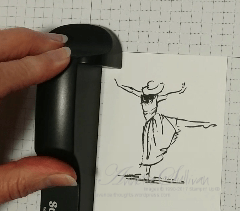
- Ink the stamp, and place in the corner of the ‘t-piece’ and stamp. Remove stamp but keep the ‘t-piece’ in place. Check that image is inked as required. If not, reink the stamp and repeat this process. When you are happy with the image remove the ‘t-piece’.
- Place the sheet with your next image in desired position.
- Remove the sheet and hold the ‘t-piece’ in place.
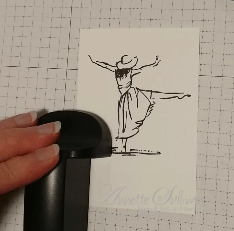
- Ink the stamp, and place in the corner of the ‘t-piece’ and stamp. Remove stamp but keep the ‘t-piece’ in place. Check that image is inked as required. If not, re-ink the stamp and repeat this process. When you are happy with the image remove the ‘t-piece’.

Tips:
- For wood mount stamps you can create your own permanent sheets using Vellum cardstock.
- Extra tips for using photopolymer stamps with the Stamp-a-ma-jig are included in the video.
Here is a video to take you through all the steps.
Please like my video and subscribe to my YouTube Channel to be the first to see my new creations.
Contact me if you would like further information.