Do you like the look of coloured images but feel intimidated about colouring each part? Whilst colouring with Alcohol Markers or Aqua Painters produces beautiful results, it is also possible to obtain similar results using the thin craft foam sheets that are available at any craft shop. Thanks to Jennifer McGuire for the inspiration and technique.
Card 1:

Card 2:
Foam stamp pieces – front and back:

Tips:
- The first step is to create the stamps using craft foam.
- The Ornate Style image is one large stamp. Stamp it on craft foam using StazOn or other solvent ink. I used Saddle Brown StazOn for this one.
- Allow the ink to dry and then fussy cut all the flowers and leaves (in groups where possible).
- Use the Stamparatus or other stamp positioning tool to stamp the image (with the real stamp) onto the cardstock to be used for the project (Whisper White here).
- Keep the stamped cardstock on the Stamparatus and align one or more of the foam images over the relevant images and pick it up with the Stamparatus plate. (For example, I aligned all of the leaves at the same time, then all of the small flowers, etc.)
- Ink the foam and stamp. Repeat if a darker image is required.
- Repeat this process with all of the foam pieces until the colouring is complete.
- The foam can be cleaned using your usual stamp cleaning methods.
- Card 1:
- The image was stamped with Memento Tuxedo Black ink on Whisper White cardstock. Inks used with craft foam pieces were Old Olive, Blushing Bride, Daffodil Delight and Highland Heather.
- Die cut the coloured image with the Ornate Layers Die.
- Use Old Olive Ink and drag around the lacy edge of the die cut.
- Use Light Pool Party Stampin’ Blends to colour the background of the piece.
- Attach the art panel to a Highland Heather card base.
- Stamp sentiment from Many Mates on Whisper White cardstock using Memento Tuxedo Black ink. Punch with the Everyday Label Punch, adjusting the size of the punched shape using the technique here. Colour the punched piece with the Light Daffodil Delight Stampin’ Blends and attach to the card with Dimensionals.
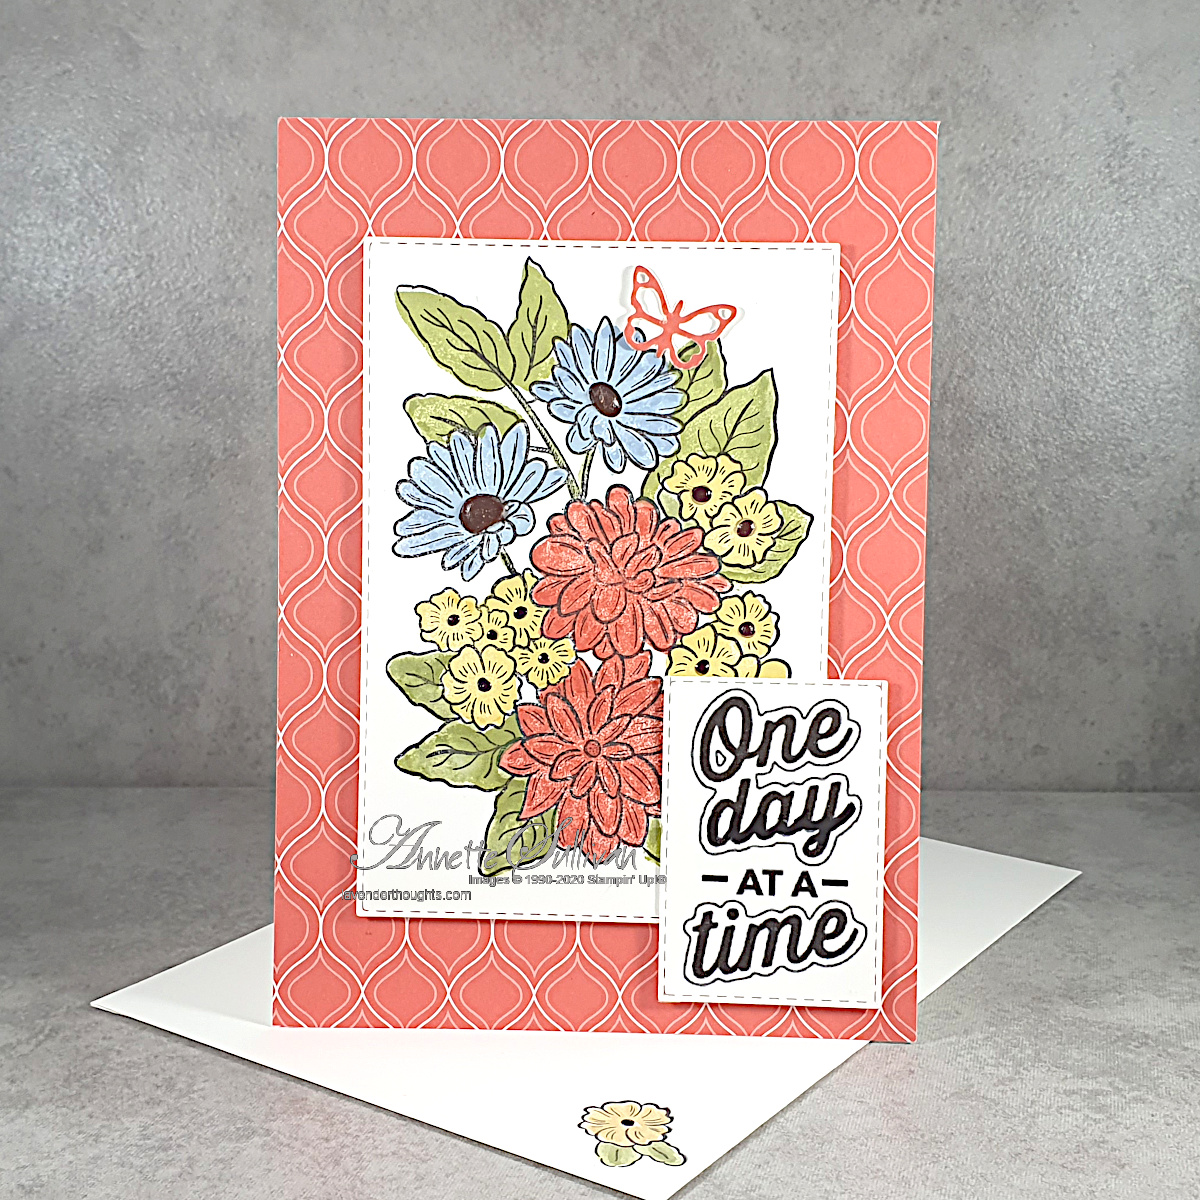
- Card 2:
- The image was stamped with Memento Tuxedo Black ink on Whisper White cardstock. Inks used with craft foam pieces were Calypso Coral, So Saffron, Seaside Spray, and Pear Pizzazz.
- Die cut the coloured image with Stitched Rectangles Dies.
- Use a Basic Black marker to colour the centres of the flowers and then add Shimmery Crystal Effects over the black.
- Die cut a butterfly with Calypso Coral cardstock and Nature’s Thoughts Dies.
- Add Calypso Coral DSP to a Thick Whisper White card base and attach coloured image to the card front. Add butterfly and sentiment of choice.
… for the insides, stamp the small floral image and add a small piece of matching DSP if applicable.


Current Promotions:

