Today I have some more alternate projects made with supplies from the kit and a pack of Very Vanilla Note Cards & Envelopes.
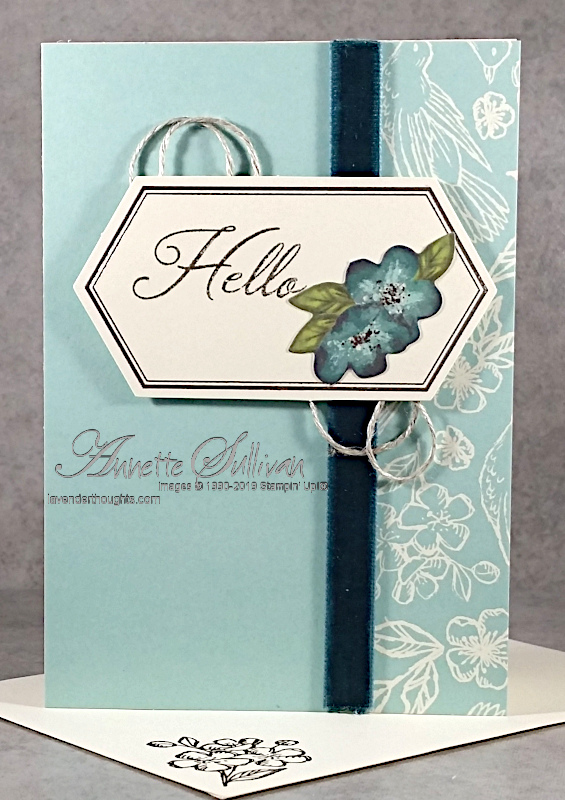
Card 1:
Card 2:

Card 3:
Tips:
- The above 3 cards have been created using one of the ‘blue patterned’ cards, matching envelope and supplies from the kit together with three Very Vanilla Note Cards & Envelopes.
- Card 1:
- I cut the blue patterned card in half along the fold line to give the blue and white patterned piece and a blank Balmy Blue piece.
- Both the blue and patterned blue pieces were then cut at 1¼” along the long sides to create a 2¼” x 5″ piece and a 1¼” x 5″ piece.
- The 2¼” piece of Balmy Blue was added to the left hand edge of a Very Vanilla Note Card. The 1¼” patterned piece was attached next to the blue piece.
- A strip of velvet ribbon was attached over the join.
- The label panel was stamped with a greeting and one of the blue die cut flowers added.
- Linen Thread was looped behind the panel which was then attached to the card front using Dimensionals.
- Card 2:
- This card uses the other two pieces – 2¼” patterned and 1¼” blue on the front of a Very Vanilla Note Card.
- Once again, a strip of velvet ribbon was attached over the join.
- The sentiment was stamped straight onto the right hand corner of the blue layer.
- A piece of a label left over from one of the previous projects was attached below the ribbon on the left hand side of the blue layer.
- One of the metallic birds was attached with adhesive dots.
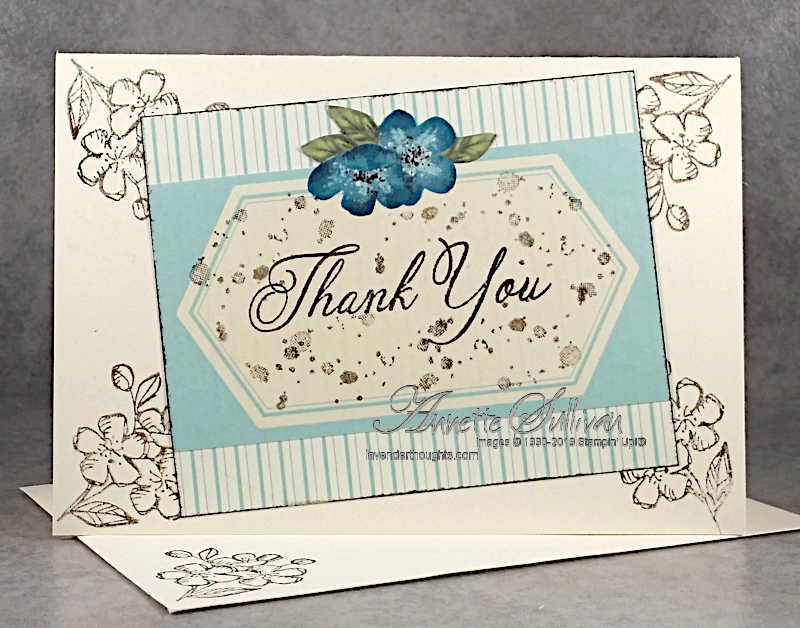
- Card 3:
- This card was made from the envelope.
- The label panel was cut close all around and fussy cut around the blue flower. A sentiment and splotches were stamped on the panel.
- Strips of the blue stripes were then attached to the top and bottom of the label panel. The ink spot was dragged around the edge of the panel to give a faux layer.
- Flowers were stamped second generation in each corner of the Very Vanilla Note card before adding the label panel on an angle.
Card 4:
Card 5:

Card 6:

Tips:
- Cards 4, 5 and 6 were made using one of the ‘pink flower’ cards, matching envelope and supplies from the kit together with three Very Vanilla Note Cards & Envelopes.
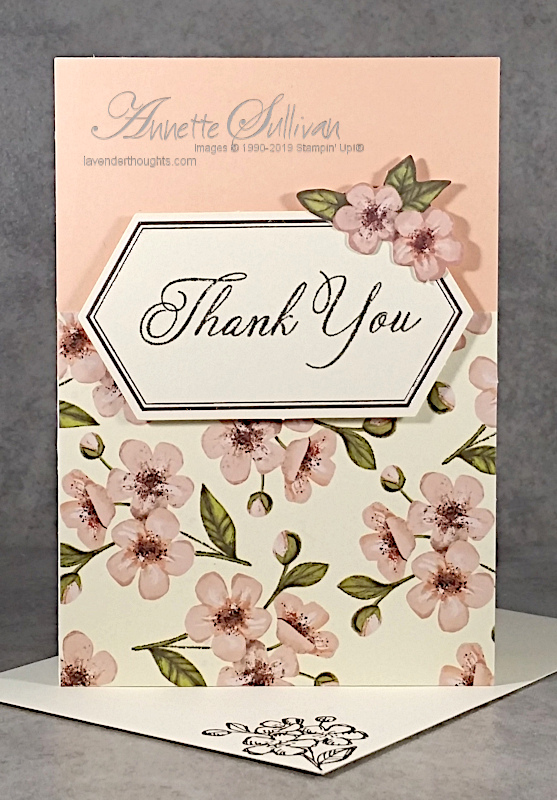
- Card 4:
- I have cut the script card in half along the fold line to give the flower piece and a blank Very Vanilla piece.
- The flower panel was then cut at 2″ on the short side to give two pieces – 2″ x 3½” and 3″ x 3½”.
- The envelope was trimmed close to each edge to give the front label panel, and the back pink panel.
- The 3″ x 3½” flower panel was added to the lower part of a Very Vanilla Note Card.
- The back pink panel was trimmed to 2″ x 3½” and added above the flower panel.
- The label panel was stamped with a sentiment and added across the join using Dimensionals.
- A die cut pink flower was added to the top right hand corner of the label.
- Card 5:
- The flower images was stamped fourth generation in the corners of a Very Vanilla Note Card.
- The ink spot was dragged around the edge of the remaining pink flower piece.
- A sentiment was stamped on a small label and added on an angle across the centre of the flower piece which was then attached to the centre of the card front using Dimensionals.
- A pink twine bow was added to the lower edge of the sentiment using Adhesive Dots.
- Card 6:
- This card was created using the envelope label panel.
- The panel was trimmed to 4¾” x 3¼” and then the label itself was carefully cut out and fussy cut around the flower.
- The outer part of the panel was attached to a Very Vanilla Note Card.
- After stamping a sentiment on the label, some pink twine was looped behind it and the label attached to the card front with Dimensionals
- From the supplies provided for 2 cards in the kit together with 6 Very Vanilla Note Cards & Envelopes, I have created 6 cards and still have supplies left over for even more projects.
- I now have 14 cards created from the supplies of only 8 cards (4 cards made straight from the instructions, 4 cards made from the supplies of 2 more cards (see earlier post), and 6 cards made from the supplies of another 2 cards in today’s post) AND I still have supplies left for another 4 standard cards (or even more if I choose to improvise).
Just to recap: What is Paper Pumpkin?
- Paper Pumpkin is a monthly papercrafting kit offered by Stampin’ Up! that is currently only available in the United States and parts of Canada.
- Because the Hugs from Shelli kit is so special, we wanted to make sure everyone everywhere would get the chance to experience it.
- To accomplish this the Shelli kit will be offered as an exclusive, limited release in all global (Europe, South Pacific, Japan and Quebec, Canada) markets starting 15 May.
The Shelli kit from Paper Pumpkin includes the following:
- An exclusive stamp set not available anywhere else
- One Classic Stampin’ Spot® from our Classic ink collection
- Paper and crafting materials to create 12 cards (3 cards of 4 unique designs)
- 12 exclusive, coordinating envelopes
- Adhesives and embellishments for all 12 cards
Coordinating Stampin’ Up! colours: Crumb Cake, Early Espresso, Old Olive, Petal Pink, Pool Party, Pretty Peacock, Soft Suede and Very Vanilla
I have a small number of these kits still available. If you live in the Toowoomba area and would like to purchase one, please contact me. Otherwise, let me know if you would like me to order one for you or visit my online shop (link below) to get your Hugs from Shelli Paper Pumpkin Kit before supplies disappear.
Stay tuned for even more alternative projects that you can make with the kit supplies.
Current Promotions:


Click on the photo of the Occasions Catalogue to download a PDF file
You can download a PDF version of the 2018 Annual Catalogue, or contact me if you would like your own copy.