Over recent weeks, I have showcased some cards using the Floating Reinker Technique. Today, I have a video to demonstrate how to create this stunning effect.
Here is the card that I have made using the flowers from the video.

Tips:
- Here are the supplies, measurements and some basic instructions. Check out the video for full details on the technique.
- Supplies:
- Stamps – Tea Together
- Card Stock – Thick Very Vanilla, Very Vanilla, Watercolor Paper, Brights Designer Series Paper (DSP)
- Ink – Versamark, Merry Merlot, Flirty Flamingo, Old Olive, Daffodil Delight
- Accessories – Black Embossing Powder, Tea Time Framelits, Lace Dynamic TIEF, Rectangle Stitched Framelits, Foam Adhesive Strips, Aqua Painter
- Measurements:
- Card Base (Thick Very Vanilla): 21cm x 14.8cm scored at 10.5cm (8½” x 5½” scored at 4¼”)
- Embossed Layer (Very Vanilla): 14.3cm x 10cm (5-3/8″ x 4-1/8″)
- Designer Series Paper: 14.8cm x 10.5cm (5½” x 4¼”)
- Watercolor Paper: 14.8cm x 10.5cm (5½” x 4¼”)
- Instructions:
- Die cut the DSP using the fourth largest of the Rectangle Stitched Framelits. Keep the inside rectangle for another project.
- Emboss the Very Vanilla piece using the Lace Dynamic TIEF.
- Stamp the floral images on the Watercolor Paper using Versamark and heat emboss with Black Embossing Powder.
- Colour the flowers / leaves using the Floating Reinker Technique:
- Small Flowers:
- Use an Aqua Painter or wet paint brush to saturate an area of the embossed flower with water. Add a drop of Flirty Flamingo ink with the Aqua Painter or paint brush and let it spread. If necessary, add more drops, one at a time to spread over the area.
- Repeat this procedure with all parts of the image, using Old Olive ink for the leaves and Daffodil Delight ink for the flower centres.
- Large Flowers:
- Repeat the procedure using Merry Merlot ink for the flowers and Old Olive ink for the leaves.
- Allow to air dry. Using a heat tool will quicken the process, but make sure the water pools are almost dry first or you will end up spreading the ink all over the art panel.
- Small Flowers:
- Die cut the flowers using the matching Framelits.
- On the inside of the DSP frame, add Foam Adhesive Strips to both inner and outer edges.
- Attach the embossed panel to the inner edge of the frame with the Foam Adhesive Strips,
- Attach the frame to the card front with the outer edge Foam Adhesive Strips.
- Arrange the die cut flowers around the frame and attach with Mini Glue Dots.
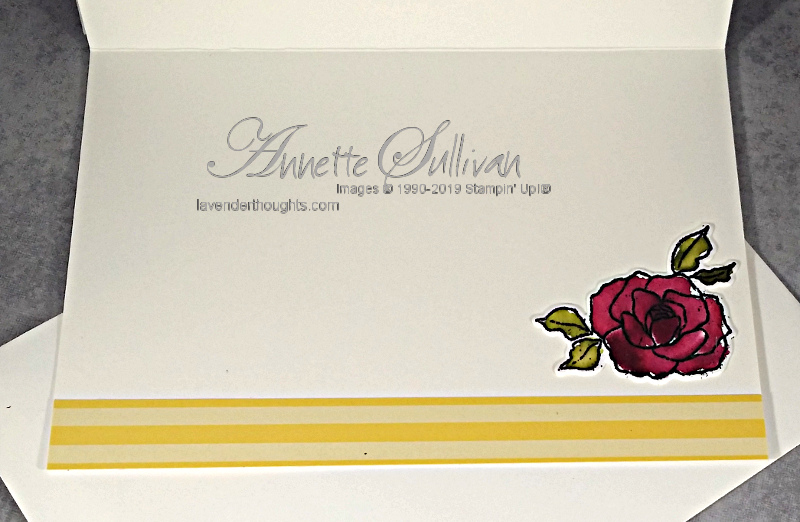
- Use a strip of DSP and one of the die cut flowers to decorate the inside of the card.
- Stamp one of the flowers on the envelope and watercolour with Aqua Painter and inks.
- The inside ….
Here is the video with all the details:
You can see other projects that I have made with this technique here.
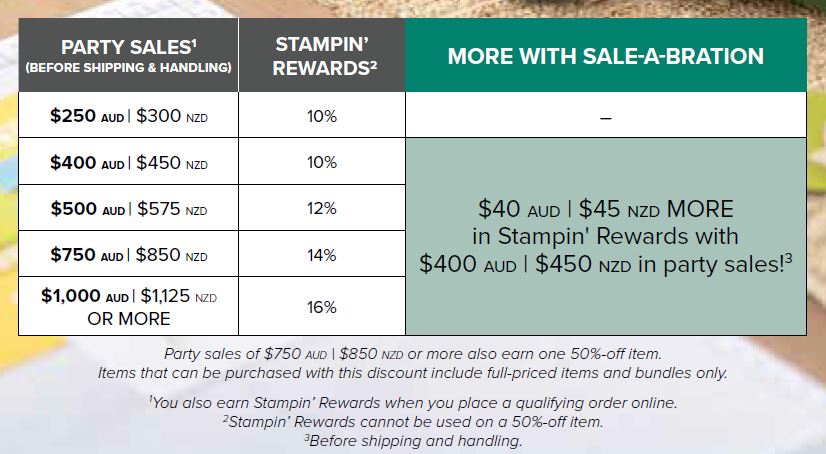
Current Promotions:
Sale-A-Bration is here! Earn yourself FREE products:
- SHOP

2. HOST

3. JOIN

Click on the photo of the Occasions Catalogue to download a PDF file

You can download a PDF version of the 2018 Annual Catalogue, or contact me if you would like your own copy.