This month I am showing you the Split Negative Technique. It may look complicated but it isn’t, and it produces a stunning finish.
The detailed instructions are for the most basic card [which I think looks great]. At the end I will give some short points on how to create some more complicated versions.
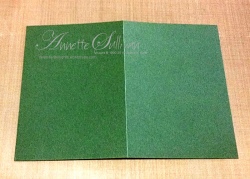
- You will need to start with a half sheet of card stock [21cm x 14.8cm or 8½” x 5½”] and score it at 10.5cm [or 4¼”] to create the base card.

- The first layer is 0.5 cm [or ¼”] smaller than the card front [i.e. 10cm x 14.3cm or 4″ x 5¼”].

- The two layers for stamping the split image are each 4.75cm x 13.8cm or 1⅞” x 5″. Select colours that either complement or contrast each other.

- Select an image that can be easily split in half vertically and stamp in on the Stamp-a-ma-jig sheet.

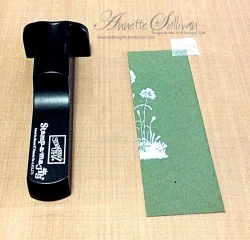
- Line up the left piece of card stock from step 3 with the Stamp-a-ma-jig sheet so that the middle of the image will finish on the right edge of the card stock. Add a piece of removable tape to keep it in place.

- Remove Stamp-a-ma-jig sheet and stamp left half of image.

- Keep left piece and Stamp-a-ma-jig in place and butt the right layer against it.

- Carefully remove stamped piece whilst keeping Stamp-a-ma-jig in place and stamp right half of the image. You may wish to add a piece of removable tape to keep the card stock in place.

- Take ink pad and sponge dauber and sponge around the outer edges of the two stamped pieces. Add sentiment to one of the panels if required.


- Line up and adhere the left hand image piece to the layer from step 2. Line up and adhere the right hand image.

- Add layered art panel on to base card stock. Here is the finished card.

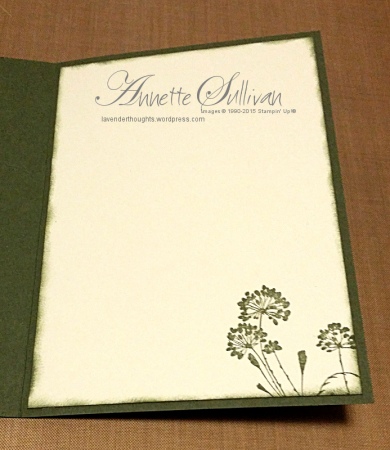
- Add a stamped panel to the inside to complete the project.

- Notes: If you intend making two cards, you can simplify the stamping process by stamping the complete image on both colours and cutting down the middle. I found that this can be a bit tricky if both pieces are not stamped and cut in exactly the same place.
Here is another sample I made using the same steps as above, but adding more layers and embellishments.
… and here is the inside
And this one takes it up even further. Thanks so much to Denise for creating this sample for me. Denise has gone for a three dimensional look with this one, rather than stamp. Isn’t it magnificent? You can see more of Denise’s great creations on Splitcoaststampers here.
Contact me if you would like further details on this project. If you have a technique that you would like me to showcase, please let me know.
- The list of Retiring Products is decreasing daily as stock runs out. Check them out here. You only have until 2 June 2015 to get your favourites before they disappear forever.
- Check out the Weekly Deals and Clearance Rack while you are visiting my shop.
- Stampin’ Up! has announced that due to quality issues, Blendabilities have been discontinued and will no longer be available for sale.


