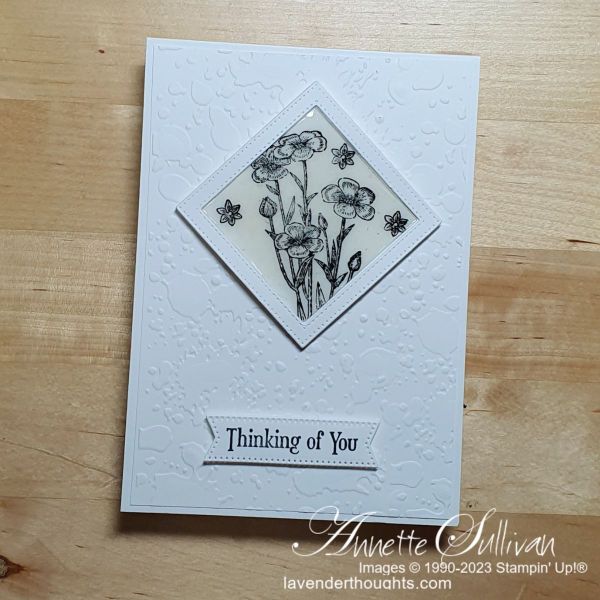
Have you seen the Faux Glass Tile look? It looks spectacular! I thought that it would be difficult but it isn’t. Keep reading to see how easy the technique is to create this beautiful finish.
Tips:
- For the art panel, take a piece of Thick Basic White and die cut to desired size.
- Use corresponding layering dies to create three frames the same size as the art panel.
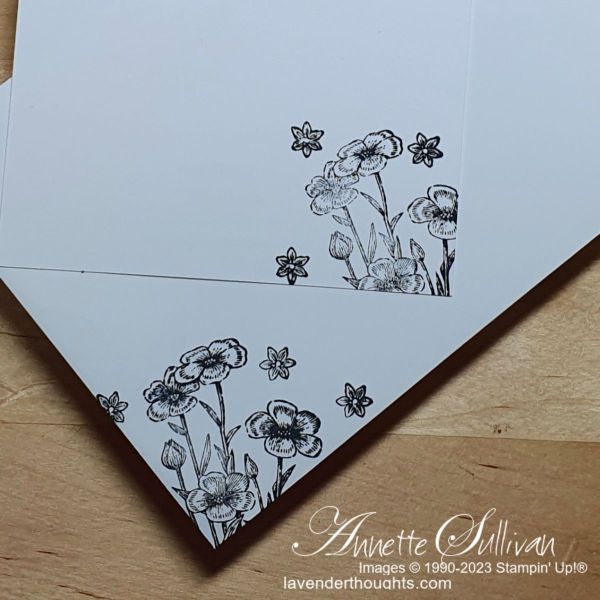
- Stamp images on the art panel with Memento Tuxedo Black ink and colour if desired.
- Add two of the frames over the art panel.
- Spread a thin layer of Clear Embossing Powder over the stamped image. Use a heat tool under the art panel to melt the powder. Add another layer of the embossing powder and heat till melted. Add a third layer if required to ensure that the panel looks shiny like glass.
- It is very important to heat from under the panel so that the powder does not go flying everywhere and melts evenly.
- Attach the third frame over the cooled image.
- Emboss a piece of Basic White with the Splatters 3D Embossing Folder and attached to the Thick Basic White card base.
- Attach the Faux Glass Tile panel using Foam Adhesive Sheets.
- Stamp a sentiment, die cut and attach with Foam Adhesive Sheets.
- Decorate the inside and envelope to match.
- Supplies:
- Stamp Set: Quite Meadow
- Cardstock: Thick Basic White, Basic White
- Ink: Memento Tuxedo Black
- Accessories: Clear Embossing Powder, Stylish Shapes Dies, Foam Adhesive Sheets, Stripes & Splatters 3D Embossing Folders
… inside and envelope
Click on the picture below to download the PDF of the current catalogue or click on Shop Now to go to my online shop.

Current Promotions:

